Structured diagnosis for unstable bottle fill levels
Water Filling Machine Fill-Level Troubleshooting
Low fills, overfills, foaming and bottle-to-bottle variation may come from product supply, container geometry, filling components, machine condition or the way results are sampled, so the pattern matters more than a single bottle.
How should inconsistent fill levels on a water filling machine be diagnosed?
Define whether the issue is consistently low, consistently high, intermittent, valve-specific, format-specific or linked to startup and speed. Put the filling center in its approved safe and hygienic state before inspection. Keep the approved product and bottle basis fixed while isolating water feed, bottle condition, operating recipe, filling positions and discharge behavior. Measure fill quantity with the agreed calibrated method and map results to valve or station, time and operating state. A qualified technician should correct only the confirmed cause, after which the team repeats the same sampling plan and verifies sealed bottles through inspection and packing.
System focus 01
1. Define the fill-level symptom and sampling basis
First distinguish a visual level difference from a measured quantity difference. Bottle geometry, panel shape, base variation and product temperature can change the visible liquid line without the same change in contained volume or mass. Record whether bottles are low, high, mixed, foaming, dripping or variable only after stops. Identify the format, cap, product source, recipe, running phase and first known occurrence. Sample in production order and, where traceability permits, link each bottle to a filling position. Retain acceptable and affected examples. A clear symptom statement prevents the team from correcting an apparent level issue that actually originates in bottle shape, measurement practice or downstream handling.
State whether the observation is visual level, volume or mass
Record bottle format, recipe, product source and operating phase
Map samples by filling position, sequence and time
Separate steady variation from startup or restart behavior
Preserve labeled bottles and the original measurement record
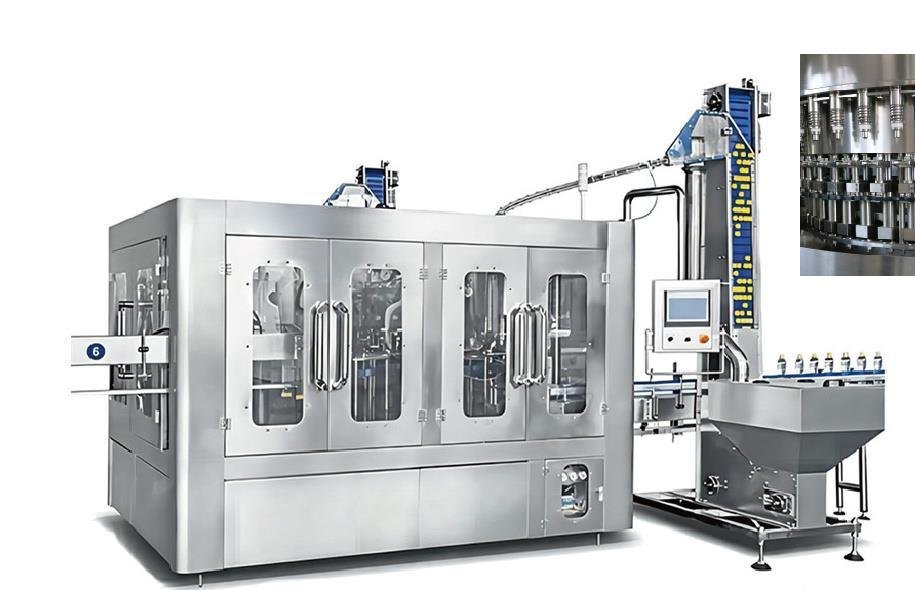
Reference equipment image. The final equipment selection, configuration and safeguards depend on the confirmed project brief.
System focus 02
2. Place the filling center in a safe and hygienic condition
Filling equipment contains moving carousels, star wheels, conveyors, electrical systems, pressurized product paths and wet surfaces. Follow the approved stop, isolation and access procedure before approaching guarded mechanisms or opening any product-contact part. Do not defeat a door switch, interlock or protective device to watch operation. If inspection requires opening a hygienic circuit, apply the site sanitation procedure and protect the system from contamination. Segregate product made since the last satisfactory check according to the authorized quality plan. Leaks, broken glass where applicable, damaged bottles, abnormal pressure indications or unexpected motion require escalation to trained personnel rather than an improvised adjustment.
Use approved shutdown and lockout steps before guarded access
Maintain hygiene controls when opening any product path
Never bypass interlocks to observe filling components
Contain affected bottles and identify the production window
Escalate leaks, damaged parts or abnormal machine behavior
System focus 03
3. Isolate product, bottle, recipe and position inputs
Confirm that the treated-water feed meets the documented filler inlet conditions for quality, flow, pressure and temperature at the relevant operating state. Review tank level, pump behavior, return or vent paths and any recent sanitation or product change. Check the approved bottle drawing, neck finish, rigidity and actual bottle condition at infeed; distorted containers can seat or vent differently. Verify recipe and change-part identity without assuming displayed values are correct. Then determine whether the pattern follows one filling valve, a group of positions, all positions, machine speed, a restart or downstream back pressure. Holding other inputs stable makes the next measurement meaningful.
Confirm water-feed conditions at the defined filler boundary
Check tank, pump, vent and recent sanitation status
Verify bottle neck, shape, rigidity and infeed stability
Match recipe and change parts to the approved format
Determine whether variation follows a position, time or operating event
System focus 04
4. Measure quantity and machine evidence systematically
Use the contractual or quality-approved method for fill evaluation. Depending on the product basis, this may involve calibrated mass measurement with a documented tare and product density basis, direct volume measurement, or a defined level gauge for the approved bottle. Use a planned sample that represents filling positions and production time rather than selecting only obvious defects. Correlate quantity with valve identity, bottle dimensions, feed conditions, machine event logs and observations such as foam, drip or incomplete venting. Inspect relevant wear, cleanliness and maintenance evidence through authorized procedures. Do not copy a level, timing, pressure or speed setting from another machine; compare actual conditions with the approved machine and format record.
Use one documented and verified measurement method
Include tare, density or gauge basis where relevant
Sample across filling positions and multiple time intervals
Correlate results with utilities, events and bottle geometry
Compare components and settings with approved records, not generic values
System focus 05
5. Apply the supported correction and repeat the production test
Once evidence identifies the likely cause, an authorized technician can clean, repair, replace or restore the relevant item under the machine instructions and site change controls. Complete any required sanitation before returning the product path to service. Restart with identified bottles and stable water feed, then repeat the original sample plan using the same measuring method. Include startup, steady operation and an ordinary controlled stop-restart if those states were part of the symptom. Confirm that corrected fill quantity does not create dripping, cap application, leakage, label or pack problems. Record results by position and time, dispose of held product through the quality process and define monitoring before formally closing the investigation.
Document the cause and authorized corrective action
Restore hygiene and all safeguards before production
Repeat the same sample design and measurement method
Verify sealing, inspection, labeling and packing interfaces
Record product disposition and follow-up monitoring
Fill-level diagnostic path
Turn variable fill into a position-based investigation
Use one approved quantity method and retain position and time information throughout the check.
1. Define the variation
Separate visible level, measured quantity, foam, drip and restart behavior.
2. Make the filler safe
Isolate hazardous motion and energy while preserving hygienic controls and held-product identity.
3. Isolate the inputs
Hold bottle, water feed, recipe and operating state stable and map the affected positions.
4. Measure by position
Apply the approved method across valves and time and correlate results with events and conditions.
5. Correct and retest
Authorize one supported action, restore sanitation and repeat the original production sample.
The machine manual, approved format record and site quality procedure govern settings, access and product disposition. This guide supplies no universal fill setpoint.
Buyer questions
Frequently asked questions
Use these answers as a project-planning starting point. Final equipment and performance remain subject to the confirmed brief.
Why can two bottles show different liquid levels but contain similar quantities?
Bottle base, shoulder and panel geometry can alter visible height. Confirm the approved quantitative method before treating every visible difference as a dosing difference.
What does a repeating problem at one filling position suggest?
It focuses attention on position-specific components, cleanliness, venting, actuation or measurement traceability, but the cause still requires inspection and evidence under the approved maintenance procedure.
Should fill settings be increased immediately when low bottles appear?
No. First establish whether the issue is real quantity, a bottle effect, feed instability, one position or a measurement error. Only qualified staff should change an approved setting after a supported diagnosis.
How should bottles produced during the investigation be handled?
Identify and segregate the affected window under the site quality procedure. Release, rework or disposal decisions belong to the authorized quality function and applicable product requirements.
Continue planning
Related production-line decisions
Move to the technical decision that depends on the information covered on this page.
Separate filler stops and rejects from constraints elsewhere on the line.
Project-specific confirmation
Capacities, process routes, layouts, utilities and equipment shown on this site are decision frameworks and reference examples. They are not a final specification, performance guarantee or offer. Confirmed scope and performance are defined in the signed technical and commercial agreement.
Allot Tech project desk
Turn your requirements into a comparable line brief.
Share the source water, bottle, target output, pack format, factory status and destination. We will use them as the basis for a project-specific configuration discussion.