Why do labels wrinkle only on some bottles?
Bottle roundness, panel movement, surface moisture, spacing or a material variation may affect only part of the stream. Trace bottle and label lots as well as machine position and time.
Structured diagnosis for bottle label application
Wrinkles, skew, rotation, vertical shift, bubbles and poor seams can be caused by the label itself, bottle shape or moisture, web handling, sensors, adhesive, shrink conditions, conveyor control or interactions among them.
Direct answer
Define the exact defect and map it by bottle location, label roll or batch, machine station, time and operating state. Stop and isolate the labeler under its approved procedure before approaching moving webs, cutters, hot adhesive, steam or heat equipment. Hold the approved bottle-label pair constant while isolating bottle condition, label dimensions and storage, web or sleeve feed, sensors, application components and conveyor spacing. Measure registration, placement and relevant process evidence against the approved format record. After a qualified correction, repeat the same sampling plan and verify appearance and adhesion through normal packing and handling.
System focus 01
Describe what is visible: diagonal placement, vertical shift, rotation, fold, trapped air, loose edge, open seam, excessive overlap, sleeve twist, uneven shrink or damage to printed registration. Mark the bottle area and direction of the defect and retain samples from before and after the first occurrence. Record bottle format, label technology, roll or batch, artwork version, recipe, speed state, operator and recent stop or splice. Determine whether every bottle is affected, the issue repeats at one application position, or it follows one roll, bottle lane or restart. Precise classification prevents a web-tracking response to a bottle-surface or material problem.
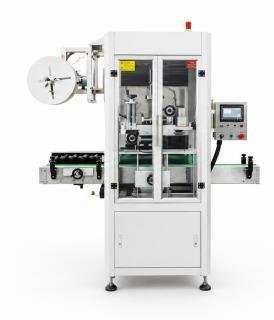
System focus 02
Labeling systems may combine fast conveyors, rotating containers, driven webs, knives, vacuum devices, heated adhesive, steam or hot-air tunnels. Follow the equipment-specific stop and energy-isolation procedure before reaching into the machine, clearing a label path or inspecting an applicator. Allow hot areas to reach a safe condition and use authorized methods for steam, adhesive and blade work. Never defeat a door switch or interlock to observe label placement. Contain affected packs so that traceability and required consumer information are protected. If codes, mandatory statements or tamper evidence are compromised, escalate to the authorized quality function before any product is released.
System focus 03
Confirm the bottle drawing, surface condition, roundness, panel behavior, temperature and moisture at labeler infeed. Match the label type, dimensions, layflat or cut length, winding direction, print registration, adhesive compatibility and storage history to the approved specification. Check that the correct reel path, guides, mandrel, cutting parts, rollers, vacuum elements or glue components are installed for the format. Review sensor identity and bottle spacing without changing several controls. For shrink sleeves, include sleeve placement and tunnel input conditions; for roll-fed or pressure-sensitive labels, include web tracking and contact behavior. Also inspect upstream drying and downstream conveyor contact.
System focus 04
Use a defined sample and reference points to measure label height, rotation, skew, seam, overlap, registration and wrinkle location as applicable. Record results by production time, roll position and machine lane or station. Measure bottle spacing and speed synchronization through approved diagnostic functions, and review sensor events, alarms and stop history. For adhesive or shrink processes, compare observed delivery and actual monitored conditions with the approved material and equipment record; do not invent a temperature, tension, pressure or adhesive target. Inspect wear, contamination and alignment of authorized components using suitable gauges or maintenance checks. Look for one evidence-supported relationship rather than adjusting until appearance improves.
System focus 05
An authorized technician should restore alignment, clean or replace a supported wear item, correct the approved material path, resolve bottle drying or apply another evidenced action under the manual and change-control procedure. Reinstall guards and confirm safe adhesive, steam or heat conditions before restart. Use identified bottles and labels, then repeat the original sample plan during startup and steady running. Assess the same placement features and pass bottles through coding, inspection, shrink or carton packing and normal handling. Confirm that label appearance, adhesion, required information and barcode or code readability remain acceptable after the pack process. Record the action, test evidence, held-product disposition and follow-up inspection frequency.
Label defect diagnostic path
Keep bottle, label batch, machine position and operating event linked throughout the investigation.
Classify and map wrinkle, skew, shift, seam, rotation or shrink behavior.
Isolate motion, cutters, hot adhesive, steam or heat before guarded access.
Hold bottle, label, format parts, sensors, web path and conveyor state stable.
Use fixed references and correlate measurements with rolls, stations, signals and events.
Apply one supported action and verify the same bottles through coding and packing.
Approved material data, machine instructions and site safety rules control adjustments. This sequence does not provide generic heat, tension, adhesive or speed settings.
Buyer questions
Use these answers as a project-planning starting point. Final equipment and performance remain subject to the confirmed brief.
Bottle roundness, panel movement, surface moisture, spacing or a material variation may affect only part of the stream. Trace bottle and label lots as well as machine position and time.
A generic increase is not a safe diagnosis. Sleeve dimensions, placement, bottle geometry, tunnel distribution, conveyor condition and the approved material window must be evaluated by qualified personnel.
Retain the event record and inspect splice construction, web path, tension control, registration recovery, material orientation and the first affected labels under the approved procedure.
Conveyor contact, film shrinking, pack compression and handling can move, scuff or reveal weakly applied labels that appear acceptable immediately after the labeler.
Capacities, process routes, layouts, utilities and equipment shown on this site are decision frameworks and reference examples. They are not a final specification, performance guarantee or offer. Confirmed scope and performance are defined in the signed technical and commercial agreement.
Allot Tech project desk
Share the source water, bottle, target output, pack format, factory status and destination. We will use them as the basis for a project-specific configuration discussion.